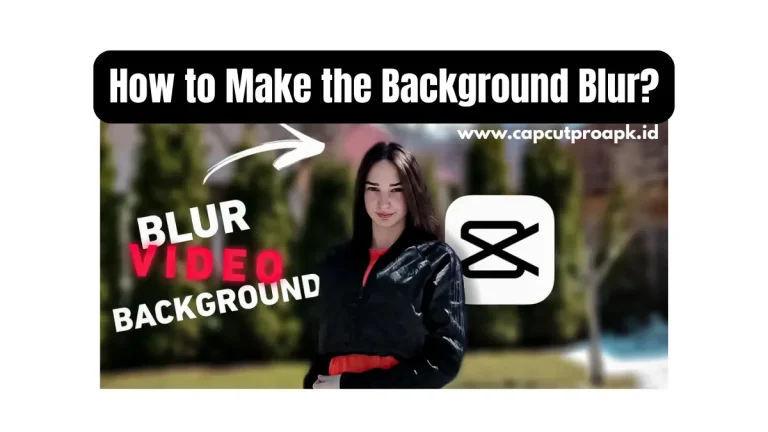
How to make the Blur Background in Capcut? [2025]
Cap Cut is one of the most popular video editing apps that is specially designed for mobile users. This app is developed for TikTok creators, YouTubers, and social media influencers. By using CapCut, users can effortlessly create attractive and professional-looking videos without any kind of editing skills. This app provides many features like trimming videos, adding background music, using filters, adding subtitles, effects, and transitions.
One of its interesting features is the auto-captioning tool, which is especially useful for social media creators. Capcut also provides a Blur Background tool that gives your video a cinematic look to protect background privacy or highlight the subject. If you want to use this tool to blur your background in a video, then follow the given instructions, because here we will discuss complete guidance about CapCut.
Benefits of Blur Videos Background in CapCut
Benefits of blurring video background in Capcut are as follows in the below;
- Blurring the background shifts the viewer’s attention directly to the main subject.
- If there is any personal item, people, or location in your background, then blurring helps to maintain privacy.
- Blur effects give your videos DSLR-style depth, which makes them look professional.
- If the background is cluttered, noisy, or distracting then applying blur helps to clean up the look without needing perfect setup.
- Blurred background videos look more refined, which helps to increase viewers’ look, attention and share on different platforms like TikTok, Instagram, etc.
- A blurred background gives your videos a high-quality feel, which reflects on your personal or business brand.
Why can users blur the Video Background?
Users use the blur option to blur their video background for several reasons that depend on the video’s needs. Here are some major reasons as follows;
- Blurring the background helps to draw attention to the main purpose or object in the video.
- If the background is very messy, crowded, and movement distracts viewers, then the blurring option is great.
- Some users blur the background to hide personal information like location, faces, or interiors.
- A blurred background gives the video a cinematic feel that looks more professional, especially in interviews.
- If users do not have a green screen setup, then blurring the background provides a studio-like look.
Method to Blur the Background in CapCut
Here are the simple and fastest ways to blur the background as follows;
1. Using Built-in Blur Effects
- Firstly, open CapCut and tap the New Project option to improve your video.
- Now select the video clip that you want to edit.
- Click on the video layer in the timeline and click the Copy option to duplicate the video.
- Now tap the lower layer and select the Style option for effects.
- Now go to the Effect option and open the Video Effect, and choose the Blur option.
- Users can also search for blur effects or apply the blur effect to the bottom click.
- Now adjust the blur intensity to your own choice.
- Make sure that the top layer is copied and resized to highlight the subject.
- Now, play and preview your video or export it.
2. Using AI Background Remover or Blur in CapCut
- Open Cap Cut and tap on the new project, and select the video you want to edit.
- Open the video layer lifetime and click on the Removed Background option.
- After the background is removed, tap on the clip again and choose the Overlay option.
- Now go to the back and re-import the same video as a new layer base and place the original clip.
- Select the bottom video, go to the video effect, and choose a blur effect.
- Adjust the blur intensity as you like.
- Now you have a sharp subject with a blurred background.
- Tap the Export option when you are done editing.
3. Using Custom Blur with Mask Tool
- Open Cap Cut and start a New Project, then import your video.
- Duplicate the video clip by selecting it and tapping Copy.
- Now, put the copied clip above the original in the timeline.
- Select the top layer and click the Mask option, or choose mask shapes.
- Here you can see different shapes like Circle, Rectangle, and Line.
- Adjust the size, position, and feather of the mask so the subject remains clear while the area is blurred.
- Now select the bottom layer and go to the Video Effect and apply the Blur effect.
- Now the top layer shows the subject through the mask, and the background is blurred.
- Check your video and export it when you are satisfied.
Tips to get a Professional Blur Effect
- Use tools like AI Background Remover or Mask Tool to separate the subject from the background.
- Before applying a mask or blur, always increase the feather between soften and edges that focus and blur areas.
- Avoid over blurring because that makes the video more blurry and artificial; use enough background blur to make the video beautiful and realistic.
- If the video is shaky, then the blur effect looks awkward; always use CapCut’s subsilization feature before adding the blur option.
- Duplicate the same video and shaky layers with different Masks or Blur Strengths. This creates depth in your video similar to the original camera.
- If your subject is moving, a suitable blur motion makes the transaction more natural and dynamic without any cutout.
- Capcut also offers ready-made portrait blur templates, especially for vlogs and reels.
Conclusion
Blurring the video background in CapCut is an amazing and useful tool. It is a very powerful tool that helps to improve video quality, draw attention to the subject, and protect your privacy. Whether you are a content creator, a vlogger, a student, or a business owner, you can set a clean and professional-looking video for your choice.
With different features like Al Background Remover, Mask Tools, and Video Effects makes it easy and user-friendly for new users to achieve the best blur video result. So if you edit your video, then don’t ignore the background.